
That $7 Latte You’re Missing? You Can Make a Better One at Home. (No, Really.)
Let’s talk. You’re neck-deep in work, your inbox is a disaster, and you’ve been bouncing from one call to the next. All you want—all you really crave—is that comforting, creamy, perfectly balanced latte from the good coffee shop down the street.
But you’re at home. The “good” coffee shop is a 15-minute drive, it’s $7+, and the thought of changing out of your sweatpants to get it feels like a personal attack.
So you shuffle over to your kitchen counter. You look at your simple coffee pot. You look at your lonely French press. And you sigh. It’s just not the same, is it? You’ve told yourself (and been told by every slick marketing campaign) that the only way to get that café magic is with a massive, gleaming, $1000 espresso machine that sounds like a small steam engine.
I’m here to tell you that’s a lie.
It’s a convenient lie that sells a lot of expensive equipment, but it’s a lie nonetheless. You absolutely can make a rich, satisfying, milk-based coffee drink at home that will scratch that itch. You just need to stop trying to make espresso and start focusing on what actually matters.
I’m not just pulling this out of thin air. I was deep in a YouTube rabbit hole on this exact problem when I came across a video from the ultimate coffee wizard, James Hoffmann. “Making Cappuccino/Latte/Flat White at Home (without an Espresso Machine).“
Jackpot.
He, a man who has access to the world’s most incredible coffee gear, was tackling our problem. And his core idea is brilliant, practical, and something we at Watch Call Coffee can get behind 100%.
His “take” (and now our “take”) is this: A great latte-style drink is just two things. That’s it. And you can nail both of them with stuff you might already own.
- A very, very strong coffee concentrate.
- Properly frothed, silky milk.
Let’s break down how to stop dreaming and start drinking great coffee at home.
Part 1: The “Espresso Imposter” (Your New Best Friend)
First, let’s get on the same page. Espresso is magic because it uses high pressure to force hot water through a tightly packed “puck” of very finely-ground coffee. This process extracts a ton of flavor and oils into a tiny amount of liquid [00:48]. That’s why it’s a “shot”—it’s concentrated.
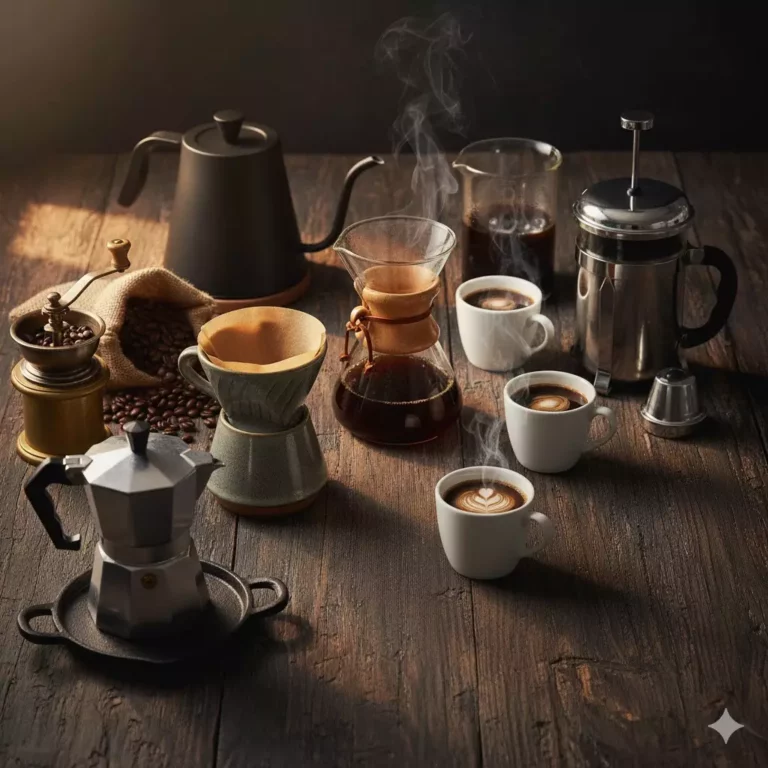
We can’t replicate that high pressure. But we can create a delicious, strong coffee concentrate that will stand up to milk and give us that rich flavor we’re craving. Hoffmann highlights two amazing, low-cost tools for this: the Moka Pot and the AeroPress.
Let’s talk about both, because you might have one of them.
The Hero in Your Cabinet: The Moka Pot
This is my favorite “hack” because so many of us have one of these iconic, eight-sided aluminum pots sitting in the back of a cupboard. We’ve been taught to just let it brew until it sputters and screams, often resulting in a coffee that’s ashy and bitter.
Hoffmann’s method [06:22] is a game-changer. It’s all about control.
The “Watch Call Coffee” Moka Pot method, inspired by the video:
- Get the Right Coffee: Hoffmann notes you should use a roast designed for espresso [03:32]. Don’t grab that light, fruity single-origin. You want something roasted a bit deeper, with notes of chocolate, nuts, or caramel. This will have the backbone to cut through the milk. Our Captains Coffee should do the trick!
- Grind Finer: You need to grind finer than you would for your normal drip coffee, but not quite as fine as true espresso powder [02:54]. Think table salt, not flour. If you only have pre-ground, that’s okay—this will still be better than nothing, but a home grinder is the single best upgrade you can make.
- Fill the Basket: Add your coffee (he uses 18g, but just fill yours) and—this is key—DO NOT TAMP IT DOWN [07:25]. Just level it off. Tamping it will create too much pressure and give you that bitter taste.
- Use Hot Water: Fill the bottom chamber with hot water. This reduces the time the pot is on the stove, so you’re not “cooking” the coffee grounds before the brewing even starts.
- Watch It Like a Hawk: Put it on medium heat [07:27] and leave the lid open. First, you’ll see a rich, dark stream of coffee start to flow. It’ll look like honey. This is the good stuff.
- THE MOST IMPORTANT STEP: The second that stream turns pale yellow and starts to bubble and sputter [07:39], your coffee is done. That sputtering is the sound of bitter, over-extracted water coming through. Snatch it off the heat immediately and run the base under cold tap water to stop the extraction cold [07:45].
What you’re left with is a 2-3 ounce shot of incredibly strong, rich coffee concentrate. Your “espresso imposter.”
The Versatile Contender: The AeroPress
If you’re an AeroPress owner, you already know it’s a flexible little tool. Hoffmann’s method [04:14] is perfect for this. He uses the “inverted” or “upside-down” method.
- Start with the plunger inside the chamber, numbers upside-down.
- Add your 18g of finely-ground coffee.
- Add 90g (or about 3oz) of hot water and stir well [05:03].
- Let it steep for 90 seconds [05:21].
- Screw on the filter cap.
- Carefully flip it onto your mug and press. He says to press all the way until you hear the final “hiss” to get every last drop of liquid [05:59].
Boom. Another beautiful coffee concentrate. You’ve officially solved Part 1.
Part 2: The “Silky Milk” Secret (It’s Not a $100 Wand)
This is where people get really intimidated. Steamed milk seems like a dark art, right? You see the baristas with their screaming, high-powered steam wands and think, “I can’t do that.”
You don’t have to. You’re not looking for “latte art foam” (at least, not yet). You’re looking for texture. You want to break down the milk fats and add tiny, tiny “micro-foam” bubbles to create that velvety, sweet-tasting, creamy liquid.
Hoffmann shows three options, but for my money, the best, cheapest, and most practical is one he features: The French Press [10:17].
Wait, what? The thing I make my other coffee in?
Yes! Your French press is one of the best-kept secrets in milk frothing. That mesh filter is perfect for aerating milk.
The “Watch Call Coffee” French Press Frothing Method:
- Heat Your Milk: Pour your milk of choice (whole milk works best, but a “barista blend” oat milk is amazing too [12:30]) into a small pot or a microwave-safe mug.
- Get It Hot, Not Boiling: You want it just hot to the touch. Hoffmann notes that milk “breaks” and tastes eggy and cooked above 70°C (158°F) [10:45]. You want it to be pleasantly hot, not scalding.
- Pour and Plunge: Pour your hot milk into your (empty, clean) French press. Put the lid/plunger on and pull it up to the top.
- Go Crazy (For 30 Seconds): Plunge up and down, up and down. Keep the filter just below the surface of the milk. You’ll feel it start to thicken and double in volume.
- Tap and Swirl: When it’s nice and frothy, take the lid off. Give the pitcher a few good taps on the counter to break any big, soapy-looking bubbles. Then, swirl the milk gently. This folds that light “foam” on top back into the liquid “milk” on the bottom, creating one single, silky, integrated texture.
That’s it. You’ve just made “micro-foam.” No $100 wand, no new machine.
(Want it even easier? Hoffmann also shows off the little electric milk frothers [12:46]. They’re about $100, and they heat and froth the milk at the push of a button. He finds them too foamy, but honestly? For a Tuesday morning, they’re a pretty fantastic, zero-effort upgrade.)
The Single Most Important Step Everyone Skips
Okay. You’ve got your strong coffee. You’ve got your frothed milk. You’re ready to pour them together and ascend to beverage nirvana.
STOP.
Before you do anything, I want you to do the one thing Hoffmann begs you to do in the video [08:04]: Taste your coffee concentrate.
Just take a tiny sip. What does it taste like?
Is it… kind of sour? Watery and weak? That means you didn’t extract enough. Next time, grind your coffee a little finer or let it brew a bit longer.
Is it… brutal? Bitter, ashy, and harsh? That means you extracted too much. Next time, grind a little coarser, or on the Moka pot, pull it off the heat even sooner.
This is the “empowering and practical” part. You’re not just following a recipe; you’re learning. By tasting your “shot” first, you know exactly what to fix next time. You are “dialing in” your brew, just like a pro barista. And you’re saving yourself from the disappointment of “wasting” a batch of perfectly good frothed milk on a bad coffee base.
Let’s Put It All Together: Your New Morning Ritual
You’ve got the concepts. You’ve got the tools. You are now officially in control of your coffee destiny.
Here’s your new 5-minute plan:
- Start your kettle boiling and turn on your stove to medium.
- Fill your Moka pot’s bottom chamber with the boiling water.
- Fill the Moka pot basket with your fine-grind, espresso-roast coffee. Level it, don’t tamp.
- Assemble the Moka pot and place it on the stove.
- While it’s brewing, pour your milk into a pot and heat it gently.
- Watch the Moka pot. The second it sputters, pull it off the heat and run the base under cold water.
- Pour your hot milk into your French press and plunge for 30 seconds.
- Pour your Moka pot “shot” into your favorite mug.
- Tap and swirl your frothed milk, then pour it right into your mug.
- Sip. Smile. Wonder why you ever paid $7+ for this.
The takeaway isn’t that you’ve made a “perfect” cappuccino that would win awards. Who cares? The takeaway is that you’ve hacked the system. You’ve taken everyday tools and, with a bit of knowledge and technique, created something delicious, comforting, and yours.
You don’t need the expensive machine. You just need to know the secrets. And now, you do.